Understanding Time Lapse Video Recording
Time lapse video recording is a specialized method of capturing a series of individual frames at set intervals over an extended period. When these frames are played back at standard video speeds, phenomena that occur gradually—such as sunrise, construction progress, or the blooming of flowers—are condensed into a short, visually compelling sequence. This technique effectively reveals progression and transformation that might be imperceptible to the naked eye over a set duration.
The process involves meticulous planning and precise execution. During filming, the camera remains stationary or moves along a predetermined path, capturing images at predetermined intervals—ranging from seconds to minutes apart. These interval settings are crucial, as they directly influence the pace at which the final video appears to progress. Once shooting is complete, the images are compiled using editing software to create a seamless sequence that showcases time passing within a compressed timeframe.
Key to successful time lapse recording is understanding the balance between interval duration, total recording time, and the desired output speed. A shorter interval produces smoother, more detailed motion, suitable for scenes with rapid changes. Conversely, longer intervals might be used for scenes with subtle or slow transformations, like plant growth or construction projects spanning months. Mastery of these technical parameters ensures the final video effectively communicates the intended narrative or visual progression.
Advanced time lapse videography often incorporates camera stabilization tools, remote control features, and programmable intervalometers—devices that automate the capturing process, reducing the need for manual intervention. These tools ensure consistency in frame capture, which is crucial for achieving high-quality, professional results.
Ultimately, understanding the core principles of time lapse video recording enables filmmakers, event organizers, and content creators to produce stunning visual sequences that vividly depict the passage of time and the evolution of subjects—making complex processes accessible and engaging for viewers.
Understanding Time Lapse Video Recording
Efficiently capturing a time lapse sequence requires more than just setting up a camera and pressing record. It involves meticulous planning of several technical parameters to ensure the final video accurately portrays the progression of the scene. Central to this process are the concepts of interval timing, total recording duration, and playback speed. The interval—the time between each shot—directly influences the smoothness and detail of the final video. For scenes with rapid movements, shorter intervals, often lasting one to five seconds, are employed to create seamless transitions. For slower-changing scenes, such as plant growth or city development over weeks, longer intervals—sometimes stretching to several minutes—are used to efficiently capture the essence of the transformation. Controlling these variables allows videographers to achieve the desired pacing and storytelling effect. The total recording time will directly determine how long the subject is documented, while the playback speed dictates how condensed the footage appears after editing. A crucial aspect of professional time lapse production involves the use of specialized tools like programmable intervalometers or automatic camera controllers. These devices can be configured to take photographs at predefined intervals, often over extended periods, with minimal manual input. They help maintain consistency in frame capture, which is essential for creating smooth, visually appealing videos. Camera stabilization also plays a pivotal role in maintaining shot quality. Tripods, gimbals, or motorized sliders are commonly used to prevent unwanted shakiness during long-duration shoots. Ensuring that the camera remains secure and level throughout the recording process is vital to produce a polished final product. Many high-end setups incorporate remote control features, enabling operators to adjust settings or change angles without disturbing the camera’s position. This reduces the risk of jitter or shifts that could detract from the visual continuity.
Overall, mastering the technical aspects of time lapse recording means understanding the delicate interplay between camera settings, stabilization, and automation tools. When orchestrated properly, these elements combine to produce compelling visual narratives that highlight the passage of time, whether it's a bustling cityscape at dusk or the slow, majestic growth of a new construction project. Advanced equipment and precise planning are the pillars supporting high-quality results, enabling creators to craft engaging visual stories that convey complex processes in a captivating, compressed format.
Understanding Time Lapse Video Recording
Time lapse video recording involves capturing a sequence of images at specified intervals over an extended period, then compiling these images into a seamless motion picture. This technique compresses what happens over hours, days, or even months into moments that can be viewed in seconds or minutes. Achieving high-quality results hinges on meticulous planning, precise equipment selection, and careful management of camera settings.
Setting up the camera correctly is fundamental. Manually adjusting exposure levels, focus, and frame rate ensures consistency throughout the shoot. Modern time lapse projects often leverage advanced cameras with built-in intervalometers or dedicated intervalometers attached externally, which trigger the shutter at predetermined intervals without manual intervention. These devices can be programmed to start, stop, and vary the frequency of image capture, minimizing the risk of human error.
Stability is another critical factor. Using professional-grade tripods, gimbals, or motorized sliders helps maintain a level, unmoving platform, especially during long recording sessions. Proper stabilization prevents jitters and vibrations that could compromise footage quality. For scenes with vibrations caused by environmental factors like wind or passing traffic, additional stabilization tools such as weighted counters or vibration dampers are recommended.
Camera Settings for Optimal Results
Adjusting camera settings thoughtfully enhances the visual appeal of the final product. Key parameters include:
- Interval: The time gap between consecutive shots should align with the speed of the subject's movement. Faster movements require shorter intervals, while slower changes can be captured with longer gaps.
- Exposure: Consistent exposure settings prevent flickering or flickering effects in the final sequence. Using manual exposure controls instead of auto modes is preferable.
- Focus: Setting the focus to manual prevents shifts during shooting that could cause focus flickering, ensuring clarity throughout the footage.
- White Balance: Manual white balance settings maintain color consistency despite changing lighting conditions.
In complex shoots, adjusting these parameters based on changing environmental factors and scene dynamics is necessary. For example, capturing a sunrise or sunset involves dynamically balancing exposure to handle changing light intensity.
Automation and Remote Control Technologies
Employing automation tools significantly improves time lapse quality and efficiency. Advanced camera systems feature built-in interval shooting modes and remote control options, enabling precise adjustments from a distance. These tools facilitate seamless operation, especially for long-duration projects where manual intervention might be impractical.
For instance, remote control devices allow operators to tweak focus, exposure, or even change framing without disturbing the camera's position. Wireless connectivity options, such as Wi-Fi or Bluetooth, enable real-time monitoring and control, providing immediate feedback and adjustments during the shoot.
Additionally, incorporating weatherproof enclosures and environmental protection devices ensures that outdoor shoots remain uninterrupted during adverse weather conditions. Power management solutions, such as portable batteries or solar-powered setups, extend recording session duration, vital for capturing lengthy events like construction projects or natural phenomena.
Understanding Time Lapse Video Recording
Time lapse video recording involves capturing a series of still images at set intervals over a period of time, which are then played back at a standard frame rate to produce a condensed, fast-forwarded video. This technique effectively highlights changes and developments in a scene that unfold gradually, such as construction projects, natural phenomena, or city life. The process hinges on precise timing, stable equipment, and consistent exposure settings to ensure smooth transitions and optimal visual quality throughout the final footage.
At the core of successful time lapse recording is the understanding that the interval between shots and the total number of images directly influence the final video’s appearance and duration. Choosing the right interval depends on the scene's rate of change: faster-changing scenes, like traffic flow, require shorter intervals, while slower subjects, like the blooming of flowers, can be captured with longer gaps. Proper planning ensures that the footage remains engaging and free of unnecessary gaps or abrupt transitions.
Key Technical Aspects to Consider
- Camera Settings: Use manual focus and exposure to prevent fluctuations that can detract from the seamless flow of the footage. Locking these settings ensures consistency across all images.
- Interval Selection: This is crucial for balancing the final video length and capturing the scene's dynamics. Many cameras and dedicated intervalometers allow users to customize the shooting interval precisely.
- Resolution and File Format: Shooting in high resolution preserves detail, especially when zooming or cropping during editing. Raw or high-quality formats provide better post-processing flexibility.
- Stability: Use sturdy tripods or mounting structures to avoid unwanted camera movement. Vibration reduction features should be disabled to prevent image blurring during fixed-position shoots.
Environmental and Lighting Considerations
Adapting to changing lighting conditions is essential in time lapse projects, especially during outdoor shoots. Employing camera features like automatic white balance, or better yet, setting manual white balance, helps maintain color consistency despite variations in ambient light. Additionally, using ND filters can control exposure during bright conditions, preventing overexposure, while increasing ISO sensitivity during low-light scenarios enhances image clarity without compromising quality.
Automation and Remote Control Technologies
Integrating automation capabilities into your setup streamlines lengthy recording sessions. Modern cameras come equipped with built-in interval shooting modes, allowing for repeated captures at defined intervals without manual input. Remote control devices, accessed via Wi-Fi or Bluetooth, enable operators to view live feeds, adjust settings, or pause shooting remotely. This is particularly advantageous in dangerous or hard-to-access locations, ensuring safety and precision.
Environmental protection is equally vital; weatherproof enclosures shield equipment during outdoor shoots, and portable power supplies, including solar chargers, can sustain ongoing recordings during extended sessions. Wireless connectivity also facilitates real-time monitoring, allowing immediate adjustments necessary when environmental conditions or scene dynamics change unexpectedly.
Incorporating Long-Term Recording Solutions
For capturing lengthy events—such as construction developments, natural phenomena, or city growth—investing in professional-grade, weatherproof, and remotely operable equipment ensures consistent results. Using batteries with high capacity or solar-powered solutions reduces interruptions, making continuous long-duration time lapse videos feasible. Such rigorous planning and equipment investment lead to high-quality footage that can serve multiple professional purposes, from promotional content to detailed project documentation.
Optimizing Camera Settings for Superior Time Lapse Footage
Choosing the right technical settings is essential to producing high-quality time lapse videos that capture the desired motion with clarity and smoothness. The primary camera parameters to focus on include interval timing, exposure settings, focus adjustments, and frame rate. Each element plays a critical role in ensuring consistent image capture, especially during extended recording sessions over hours or days.
When setting the interval between shots, consider the speed of the motion or change being documented. For fast-moving subjects like traffic flow or construction equipment, shorter intervals—ranging from one to five seconds—are preferable to avoid missing critical changes. Conversely, for slower scenes such as city growth or cloud movement, intervals of 10 seconds or more might suffice, reducing total file size and storage requirements.
Exposure settings must be tailored to lighting conditions to prevent overexposure during bright daytime shoots or underexposure in low-light environments. Manual control over shutter speed, aperture, and ISO ensures consistent image quality throughout the session. A neutral density filter can be invaluable during daytime recordings to maintain optimal shutter speeds without sacrificing aperture or ISO, resulting in smooth motion blur that mimics real-life perception.
Focus accuracy is achieved through manual focusing, especially when scene elements remain static in the foreground or background. Autofocus can introduce unwanted shifts, creating jittery footage. Locking focus before starting the shoot guarantees consistency across hundreds or thousands of frames. Additionally, setting the camera to a fixed white balance minimizes color shifts, preserving visual continuity.
Frame rate considerations involve capturing a sufficient number of frames per second to achieve fluid motion in the final video. Typical time lapse workflows interpolate frames to produce smooth playback, but high-resolution videos benefit from capturing at the native frame rate with proper settings to avoid choppiness.
Techniques to Ensure Smooth and High-Quality Time Lapse Output
- Use a sturdy tripod or mount to prevent camera shake during prolonged recording sessions.
- Disable automatic settings that may adjust during the shoot, such as auto-focus and auto-exposure.
- Implement manual adjustments beforehand to stabilize shot parameters across the session.
- Maintain consistent framing by marking camera position and using reference points, especially in complex scenes.
- Employ intervalometers or cameras with built-in interval shooting modes to automate image capture flawlessly.
- Start with test runs to fine-tune settings, ensuring the best possible footage before committing to the full recording.
Implementing these carefully considered settings and techniques ensures that every frame contributes to a cohesive, visually compelling time lapse journey. The outcome is smooth playback, color consistency, and crisp imagery that accurately captures the dynamic change over time.
Technical Settings and Shooting Techniques
Achieving high-quality time lapse videos relies heavily on selecting appropriate technical settings and employing precise shooting techniques. Properly configuring your camera's settings ensures consistency across hundreds or thousands of frames, which directly impacts the final visual coherence of the video. One essential aspect is the choice of interval timing. Depending on the subject's rate of change, intervals can vary from a few seconds to several minutes. For instance, capturing the movement of traffic or clouds generally requires shorter intervals, while environmental changes like plant growth might need longer gaps.
Stability is paramount in time lapse recording. Utilizing a sturdy tripod or custom mounting system is crucial to prevent camera shake during extended shoots. Any movement can lead to jittery footage that detracts from the effect. Additionally, employing a remote trigger or intervalometer automates the image capture process, allowing for uninterrupted recording without manual intervention. Modern cameras often incorporate built-in interval shooting modes, simplifying this task further.
Configuring manual focus and exposure settings before starting the recording session helps maintain consistency. Auto-focus should be disabled, as it may shift during recording, causing focus inconsistencies. Similarly, manual exposure controls such as aperture, ISO, and shutter speed should be fixed, especially when lighting conditions are stable. If lighting conditions change dramatically, consider setting the camera to a dynamic mode that tracks brightness levels but manually adjust parameters initially for optimal results.
White balance settings should be locked to prevent color shifts over time. Using a fixed white balance ensures that the colors in your footage remain consistent throughout the sequence. When capturing scenes with significant brightness variations, setting a custom white balance calibrated to your environment can further enhance image uniformity.
Before committing to a full recording session, conducting test runs is essential. These tests allow you to fine-tune interval durations, camera angles, and exposure settings. Reviewing test footage helps identify potential issues such as overexposure, underexposure, or framing problems. Adjustments made at this stage make the actual recording process more efficient and reliable.
Consistent framing is vital, especially for scenes involving complex movements or multiple elements. Marking positions or using reference points can help maintain perspective through the entire recording session. Employing motion stabilization tools during editing can further enhance sequence smoothness, particularly if minor shifts occur during shooting.
In professional settings, operators often utilize intervalometers that synchronize with the camera's shutter release, enabling precise control over shot intervals. For more dynamic scenes, varying intervals at different points in the shoot can amplify storytelling or visual impact. Meticulous planning and adherence to these technical considerations result in a seamless and visually compelling time lapse video that accurately captures the transformation over time.
Advanced Techniques for Time Lapse Video Recording
For enthusiasts seeking to elevate their time lapse footage, integrating advanced filming techniques can significantly enhance the visual impact and storytelling capability of the project. Techniques such as hyper-lapse, which involves capturing images while moving the camera over considerable distances, can create dynamic, cinematic sequences that convey motion across vast areas or long periods. Implementing this method requires stability tools like gimbals or dollies to ensure smooth movement, alongside meticulous planning of the camera path and interval settings.
Another sophisticated approach involves combining multiple time lapse sequences shot with varying interval settings to capture different phases of a scene. For instance, a rapid capture of sunrise with short intervals can be seamlessly transitioned into a longer sequence depicting sunset or nightfall, providing viewers with a comprehensive view of a day or event unfolding. This multi-layered technique demands precise synchronization and thoughtful editing but results in a compelling narrative flow.
Incorporating motion control systems offers precise, programmable camera movements during recording sessions. These systems can automate complex motion paths, repeat them for consistency, and integrate with interval timers for synchronizing movement with subject changes. When executed correctly, motion control can add a layer of professionalism and polish that distinguishes high-quality time lapse videos from casual captures.
Optimal results from these advanced methods depend heavily on a thorough understanding of the technical nuances and reliable equipment. Ensuring your camera supports remote control shooting, supports intervalometer functionality, and integrates with external motion devices will yield the best outcomes. Diligent pre-shoot planning, including detailed shot lists and scene breakdowns, mitigates potential technical issues and maximizes efficiency during the shoot.
Best Practices for Capturing High-Quality Time Lapse Videos
While technical expertise is vital, adhering to certain best practices ensures the production of visually striking time lapse videos. Consistent framing, as previously emphasized, maintains scene stability over extended periods. Using physical markers or reference points within the scene helps swiftly correct any drift or misalignment. Additionally, employing a sturdy tripod and, when possible, remote monitoring tools allows for real-time adjustments without disturbing the setup.
Environmental considerations must also be prioritized. Protecting equipment from weather elements or vibrations—especially in outdoor scenes—is crucial. Utilizing weatherproof housings or covers can prevent damage and ensure uninterrupted recording. Moreover, selecting suitable ND filters when shooting in bright conditions prevents overexposure and preserves image clarity and detail.
Effective management of power sources is equally important, given the extended recording duration. Using high-capacity batteries or external power supplies can eliminate potential downtime caused by power depletion. Timing the shoot to avoid peak activity associated with light changes, or other environmental factors, enhances the quality of the final product.
Post-Production Techniques to Enhance Your Time Lapse Videos
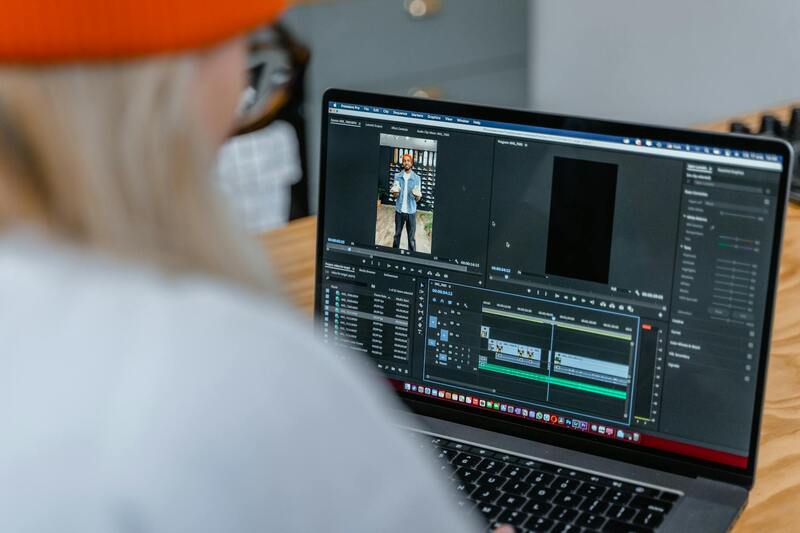
After capturing your footage, post-production offers opportunities to refine, stabilize, and creatively edit your time lapse videos. Software solutions such as Adobe Premiere Pro, Final Cut Pro, or dedicated time lapse editors enable frame adjustments, speed ramping, color correction, and seamless transition creation. These tools help to maintain visual continuity and accentuate pivotal moments within the sequence.
Stabilization is often necessary, particularly if minor shifts occurred during shooting. Video stabilization algorithms analyze motion and adjust frames to produce smooth motion. Corrective color grading can also help to unify exposure and color balance across various segments, especially when shooting across changing lighting conditions.
The addition of subtitles, overlays, or other graphical elements can further tell a story or highlight specific aspects within the sequence. Sound can also be integrated to complement the visual flow, providing a more immersive viewer experience. Lastly, exporting with high-quality settings ensures that the final video retains its clarity and detail when shared or presented on different platforms.
Executing a Professional Time Lapse Video Recording in Miami
Achieving high-quality time lapse videos that effectively capture the desired transformation or event requires adherence to best practices for execution. When undertaking a project in Miami, partnering with experienced professionals can optimize outcomes, but understanding the core methodologies ensures that your vision is aligned with industry standards.
Employing the Correct Shooting Techniques
The foundation of a compelling time lapse video lies in meticulous shooting techniques. Consistency in camera positioning and settings is essential to prevent unwanted shifts or flickering during the sequence. Use a sturdy tripod to maintain a stable frame, and ensure the camera is securely mounted. This stability minimizes movement, enabling smooth playback and a seamless viewing experience.
It's critical to set your camera’s intervalometer or timer to capture images at regular, predetermined intervals. For dynamic scenes with rapid changes, shorter intervals—such as one to three seconds—are preferable; for slower transitions, longer gaps—up to several minutes—may be appropriate. Adjusting shutter speed, aperture, and ISO according to lighting conditions ensures optimal exposure and minimizes noise or exposure inconsistencies.
Managing Environmental and Lighting Conditions
Environmental factors profoundly impact the quality of your time lapse. Urban settings like Miami may introduce challenges such as traffic, crowds, or fluctuating natural light levels. Scheduling shoots during periods of minimal environmental disturbances or at times when lighting conditions are stable—like early mornings or late evenings—can lead to more uniform footage.
Attaching neutral density (ND) filters can help control exposure during bright daylight conditions, preventing overexposure and allowing for creative effects like motion blur. Furthermore, weather considerations—like avoiding rain or high winds—are crucial to protect your equipment and maintain the integrity of the shoot.
Utilizing Advanced Camera Features
Leverage camera features such as focus stacking, manual focus, and exposure bracketing to enhance image consistency. Manual focus prevents focus shifts as lighting or scene elements change, which is vital for smooth animations. Additionally, shooting in RAW format preserves maximum image data, affording greater flexibility during post-production adjustments.
Continuity and Monitoring During Shooting
During extended shoots, consistent monitoring ensures the camera remains operational and settings stay unchanged. Many professionals employ remote monitoring systems or intervalometers with preview capabilities, enabling adjustments without disturbing the ongoing capture process. Regularly inspecting the setup helps identify issues early, reducing the need for reshoots or extensive editing corrections.
Post-Production Refinements for Professional Results
Once the images are collected, meticulous post-production work transforms raw sequences into polished time lapse videos. Frame sequencing and correction—such as stabilizing minor shifts—are paramount to maintaining visual continuity. Applying color correction and grading ensures consistent exposure and tone across the entire sequence, even if lighting fluctuated during the shoot.
Finally, creative editing—adding motion effects, transitions, or overlays—can elevate the final product, establishing a compelling narrative or visual impact. Sound integration, when appropriate, completes the immersive experience, especially for projects intended for promotional or presentation purposes.